
Date and Time is
![]()
![]()
![]()
| Motto: Fun with panoramas, drones, photography 😉 |
| Hello! Great you are here. 😻 Let's spend a happy time with our hobby! Let's go. First to do: Register. To get your own Webspace for your Panoramas. |
| Register. The first step is: Register to see more panoramas, upload own panaoramas and edit them. And to join the community. 👍 I want to build up a community together with similar minded people where we can, additional to normal panoramas (made with camera and fisheye) upload and show also panoramas shot with smartphones and drones - what is i. e. not possible at 360 cities. And want to offer many more features compared to other similar websites with a lot of additional possibilities. It is for sure attractive for many panorama friends. |
| Uploading Panoramas 👇 |
| General information about uploading panoramas: Ideally, panoramas should have a width:height ratio of 2:1 so ideally 16384 x 8912 or 8912 x 4096 They should not exceed 16384 in width A size of approx. 30 - 40 megabytes is manageable - with larger images it becomes critical for most users; depending on which device you want to view the panoramas on. In any case, with timelines, amounts of data accumulate that correspond to short YouTube videos. If you start with panoramas, you're looking for information. These abound on the internet. I'll keep posting tips here. Drone panoramas: DJI has now integrated automatic drone photography. You can read more about this in the blog. If you're doing panoramas with your cell phone, the best thing to do is to use the Panorama App from Dermandar! For a few euros you can have high-resolution images unlocked there. You then have to stitch them together (e.g. with BIMO-Stitch, free of charge in the Google Playstore), but you get a very good image quality in return |
 |
| On the startpage click PanoShow |
| The button |
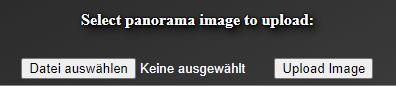 |
| Click on the left Button and select the image in the opening window. Then on the right to upload the panorama. Important note: No space inside the filename and the name of the panorama should be formatted as follows: yyyy-mm-dd_hh-ii-ss_Pano.jpg Year-Month-Day_Hour-Minute-Second_Something.jpg If this is the case (if it is the exact shooting time) then it must not be edited later. The software is trying to figure it out if it detects a different name and tries to find out the shooting time from the exif data but there are many formattings avalable especially with smartphones so it will not always fit and has to be edited by hand. |
| Panoshow |
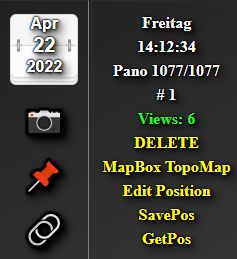 |
| Shows our panoramas and here we make further settings 🔗 Right click and "Copy link" copies a shortcut of the panorama link into the clipboard . This is the most common way when we send the link others to show them the panorama, for use on social media, emails, etc. |
| Make Panoramas public |
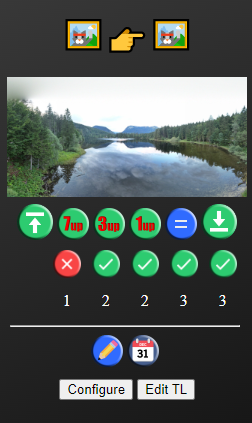 |
| In the second row are the buttons with which you can publish the corresponding panorama. There are different levels of membership at Panoworlds. This is also reflected in the number of panoramas that can be seen. From left to right: For everyone without registration For everyone with registration For everyone with paid membership For one individual group determined by yourself. Only for your own channel. So that as many as possible opt for a fixed paid membership, the number for the other two levels is kept smaller. This automatically is still in development and also depends on how Panoworlds develops in general. |