
Date and Time is
![]()
![]()
![]()
| Motto: Spaß mit Panoramen, Drohnen, Fotografie 😉 |
| Hallo! Schön dass Du hier bist 😻 Verbringen wir eine frohe Zeit mit unserem Hobby! Auf geht's. Als erstes: Registrieren. Damit Du deinen eigenen Webspace für Deine Panoramen bekommst. |
| Registrieren Der erste Schritt ist: Registrieren, um mehr Panoramen zu sehen, eigene Panoramen hochzuladen und diese zu bearbeiten Und um der Community beizutreten. 👍 Ich möchte eine Community mit vielen Gleichgesinnten entwickeln, wo wir neben normalen Panoramen (mit normalem Fotoapparat mit Fischauge gemacht) auch Panoramen, die mit Smartphones und Dronen geschossen wurden, hochladen und zeigen können, was z. B. bei 360 Cities nicht möglich ist. Und anders als bei anderen ähnlichen Webseiten, mit einer Menge zusätzlicher Eigenschaften. Es ist auf jeden Fall für viele Panorama-Freunde interessant. |
| Panoramen hochladen 👇 |
| Generelles zum Hochladen von Panoramen: Panoramen haben im Idealfall ein Verhältnis bzgl. Breite:Höhe von 2:1 also idealerweise 16384 x 8912 oder 8912 x 4096 Sie sollten 16384 in der Breite nicht überschreiten Eine Größe von ca. 30 - 40 MegaByte ist verkraftbar - bei größeren Bildern wird es für die meisten User kritisch; je nachdem auf welchen Gerät sie die Panoramen betrachten wollen. Bei Timelines kommen sowieso Datenmengen zusammen, die kurzen YouTube-Videos entsprechen. Wer mit Panoramen anfängt sucht mach Informationen. Diese gibt es zuhauf im Internet. Ich werde hier laufend Tipps veröffentlichen. Dronen-Panoramen: DJI hat mittlerweile automatische Drohnenfotografie integriert. Im Blog ist dazu mehr zu lesen. Wer mit dem Handy Panonoramen macht, nutzt am besten die Panorama App von Dermandar! Für ein paar Euro kann man sich dort Hochauflösende Bilder freischalten lassen. Diese muss man dann noch zusammen-stitchen (zum Beispiel mit BIMO-Stitsch, kostenlos im Google-Playstore), bekommt aber dafür eine sehr gute Bild-Qualität. Alle anderen Apps, die vorgeben, Panoramen herstellen zu können, sind einigermaßen ungeeignet. Das Ergebnis ist bei den meisten grauenhaft. |
 |
| Klicke auf der Startseite auf PanoShow |
| Der Knopf |
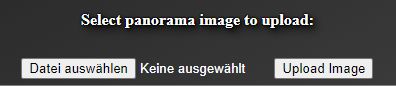 |
| Klicke auf den linken Auswahlknopf im sich öffnenden Fenster. Danach auf den rechten um das Panorama hochzuladen. Wichtiger Hinweis: Keine Leerstellen im Filenamen und der Name des Panorama sollte folgendes Format haben: jjjj-mm-tt_hh-ii-ss_Pano.jpg Jahr-Monat-Tag_Stunde-Minute-Sekunde_Irgendwas.jpg In diesem Fall muss der Name (die exakte Aufnahmezeit) später nicht nachbearbeitet werden. Das Programm versucht anhand der vorhandenen Daten zwar die Aufnahmezeit zu ermitteln und setzt sie ein, aber es gibt viele verschiedene Formate bei Smartphones, dass das nicht immer funktioniert und deshalb manchmal von Hand nachgeholt werden muss. |
| Panoshow |
 |
| Zeigt unsere Panoramen an und hier nehmen wir weitere Einstellungen vor 🔗 Rechtsklick und "Kopieren des Links" kopiert eine Kurzform des Panorama-Links in die Zwischenablage. Dies ist die meistens verwendete Art, wenn wir den Link versenden, um anderen das Panorama zu zeigen, zur Verwendung in den sozialen Medien, in Emails usw. |
| Panoramen veröffentlichen |
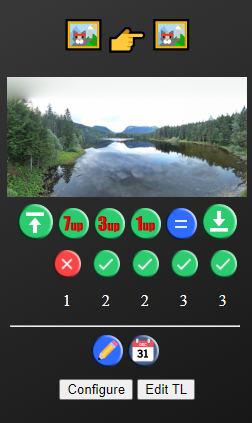 |
| In der zweiten Reihe befinden sich die Schaltknöpfe mit denen man das entsprechende Panorama veröffentlichen kann. Es gibt bei Panoworlds verschiedene Levels der Mitgliedschaft. Dies spiegelt sich auch in der Anzahl der zu sehenden Anzahl der Panoramen wieder. Von links nach rechts: Für alle ohne Registierung Für alle mit Registrierung Für alle mit bezahlter Mitgliedschaft Für eine von Dir selbst bestimmte individuelle Gruppe. Nur für Deinen eigenen Kanal. Damit sich möglichst viele für eine feste bezahlte Mitgliedschaft entscheiden, wird die Anzahl für die beiden anderen Level kleiner gehalten. Dieses automatisch zu gestalten ist noch in der Entwicklung und hängt auch davon ab, wie sich Panoworlds allgemein entwickelt. |